Why Fixture Orientation Matters More Than You Think
In stage lighting, a single misaligned fixture can distort a carefully programmed cue, compromise audience sightlines, or disrupt visual symmetry. After the rigging team has hung the lights, verifying fixture orientation becomes a crucial step—often overlooked yet essential to ensuring that your lighting plot translates faithfully to the stage.
Whether working in a theatrical grid, a touring truss, or an unconventional venue, checking pan and tilt alignment after hang ensures clean transitions, consistent beam direction, and accurate gobo positioning.
Common Causes of Orientation Errors
Even with precision planning, fixtures can be installed at incorrect angles due to:
Haste during rigging in time-constrained setups
Incorrect truss rotation or mounting on the wrong side of the pipe
Tilt zero not matching physical straight down due to yoke variation
Locking clamps shifted during tightening
Re-homing inconsistencies after power cycle
These small issues can snowball into programming headaches and on-site troubleshooting unless corrected early.
Step-by-Step: How to Verify Orientation
A proper post-hang orientation check should include the following steps:
Home All Fixtures
Initiate a "home" command from your lighting console to return all intelligent fixtures to their default pan and tilt values.Visual Check from FOH or Center
Observe the field of light each unit produces—beams should be vertically straight or symmetrical across mirrored units.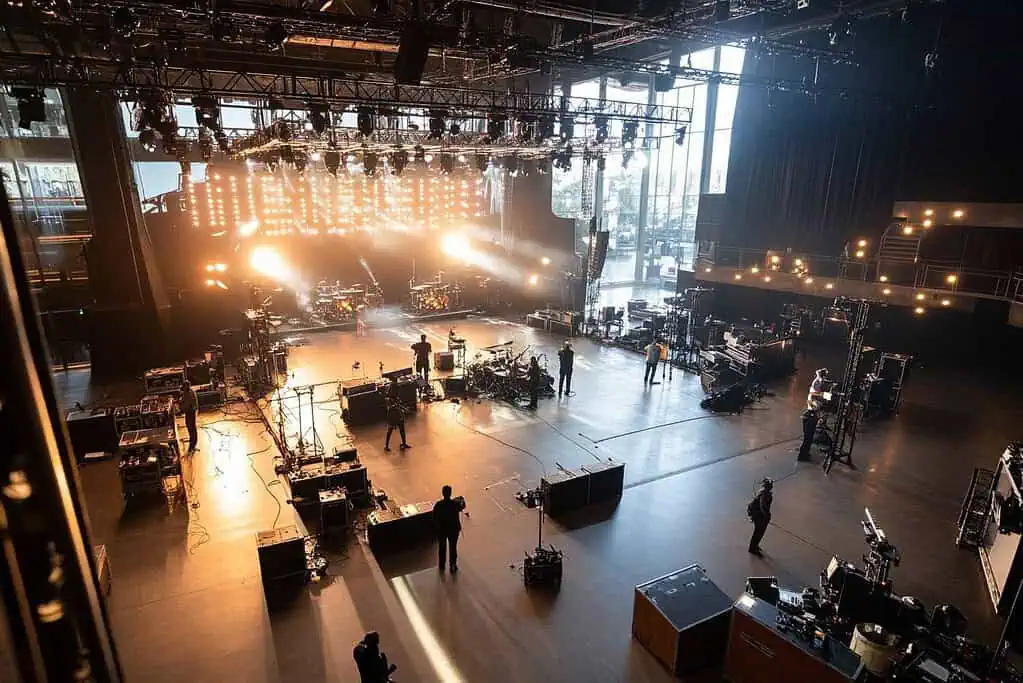
Pan Flip or Invert Mode Check
Confirm if fixtures are operating in "Pan Flip" or “Invert” mode unintentionally. Many installers set these via onboard menu or remote control.Reference Plot Verification
Compare physical hang with the lighting plot or 3D visualization. A single unit with reversed orientation can ruin pattern logic or chases.Manual Adjustment if Needed
Carefully loosen clamps and rotate heads or yokes for minor corrections. Avoid changing DMX settings unless absolutely necessary.
Tools That Help: Bubble Levels, Lasers, and Consoles
A few tools can assist in accurate orientation:
Bubble levels or spirit levels mounted temporarily on the fixture head
Laser pointers to identify misdirected units from the stage
Grid templates or CAD overlays to identify deviations
Visualization software to compare live rig with virtual design
While these tools don’t replace hands-on verification, they greatly reduce ambiguity, especially when working with symmetrical designs or tight scenic integration.
Considerations for Different Fixture Types
Orientation checks vary depending on fixture type:
Moving Heads (Spot/Beam/Wash): Zero tilt should point directly downward when hung vertically. Confirm gobo orientation and framing shutter alignment.
Pars and Floods: These are often hung in multiples. A slight yaw or roll discrepancy can make wash lines uneven.
Profile or Ellipsoidals: Rotation around the lens barrel must be locked after focusing to avoid pattern skew.
Pixel Bars or Linear Fixtures: These need precise angle matching across units to ensure smooth visual effects.
The Impact on Programming and Looks
Correct orientation ensures that lighting cues translate seamlessly from pre-visualization to execution. When a fixture is 180° out of alignment:
Gobos may appear upside-down
Color scrolls or transitions behave in reverse
Chases and pan effects break rhythm
Symmetry between stage left/right is ruined
Zoom or frost effects target unintended zones
This not only affects aesthetics but increases tech rehearsal time and reprogramming needs—costing money and crew hours.
When to Perform Orientation Checks
Immediately After Hanging: Before power-up, inspect physical angles relative to ground.
After Addressing and Power-On: Use homing to check pan/tilt consistency.
Post-Rigging Revisions: If the truss was repositioned, re-check everything.
After Travel (Touring): Fixtures may shift slightly after transportation or when rig is reassembled.
Orientation checks should be part of every standard pre-show checklist, not just for large events.
Touring and Outdoor Rigging Considerations
For mobile or temporary setups, time pressure can make this step feel optional—but it's even more important. Outdoor conditions like uneven surfaces or hasty lifts can misalign otherwise perfect plans.
To simplify orientation tasks for touring:
Label each fixture with its ideal pan/tilt position
Use color-coded tape or magnets for beam directions
Preprogram home positions into show files
Train local crew to perform checks before LD arrives
Conclusion: The Small Check That Saves Big Problems
While verifying fixture orientation post-hang may take just a few minutes per unit, it can save hours of frustration during cueing, rehearsal, or even mid-show. A properly oriented rig gives you the foundation needed to execute dynamic, polished lighting designs—no matter how complex the show.
Making this process standard in your workflow elevates your professionalism and ensures that your fixtures always perform exactly as you intended.
READ MORE:


Blue Sea Lighting is an enterprise with rich experience in the integration of industry and trade in stage lighting and stage special effects related equipment. Its products include moving head lights, par lights, wall washer lights, logo gobo projector lights, power distributor, stage effects such as electronic fireworks machines, snow machines, smoke bubble machines, and related accessories such as light clamps.
Quick Links
For more questions subscribe to our email